How to photograph fireworks with 8 easy tips

How to photograph fireworks with 8 easy tips

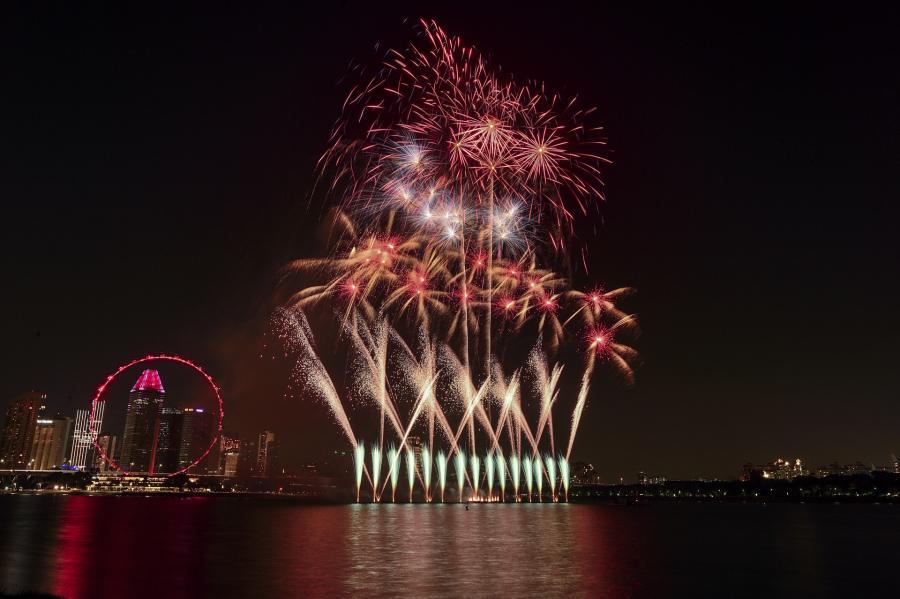
Marina Barrage fireworks viewed from the bay

New year celebrations are around the corner and you are not sure how to capture the fireworks with your camera? Fireworks photography is a difficult one, and even trickier as you may not have multiple opportunities to practice. What can go wrong? Pictures are too bright, too smoky, firework is out of focus or out of frame. But this can be easily avoided by following some easy steps.

Tip 1: Scout out the location
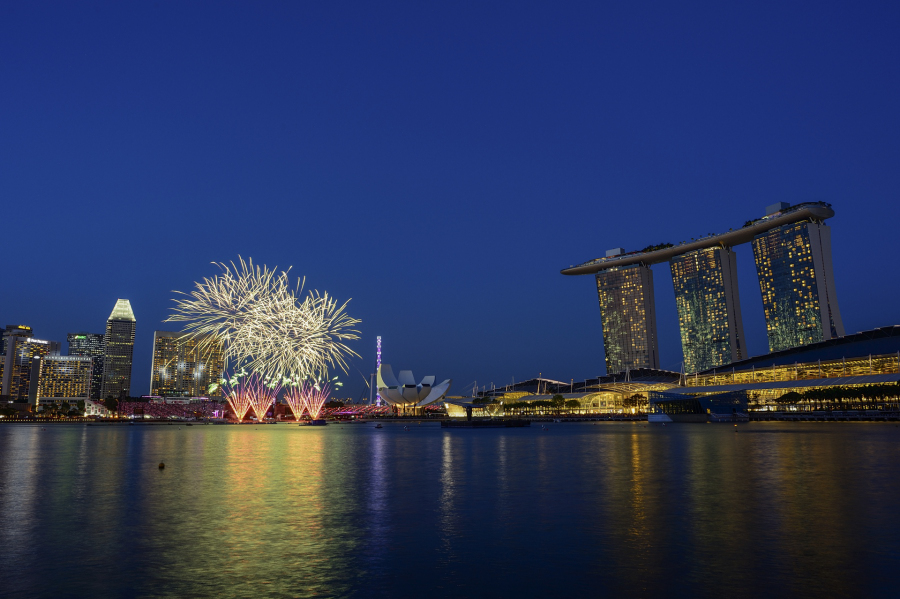
Everything will become more difficult when the sun is down and the crowd is here! Ideally, come and check out the place a few days before, find your spot, define the frame you want to do and hence the lens you should bring. And by all means, arrive early on the day of the show itself to secure your spot and set all your parameters. When the show begins, you will only need to trigger the shutter!
Firework on the left with Marina Bay Sand on the right and dark vivid blue sky

Tip 2: Bring the right equipment

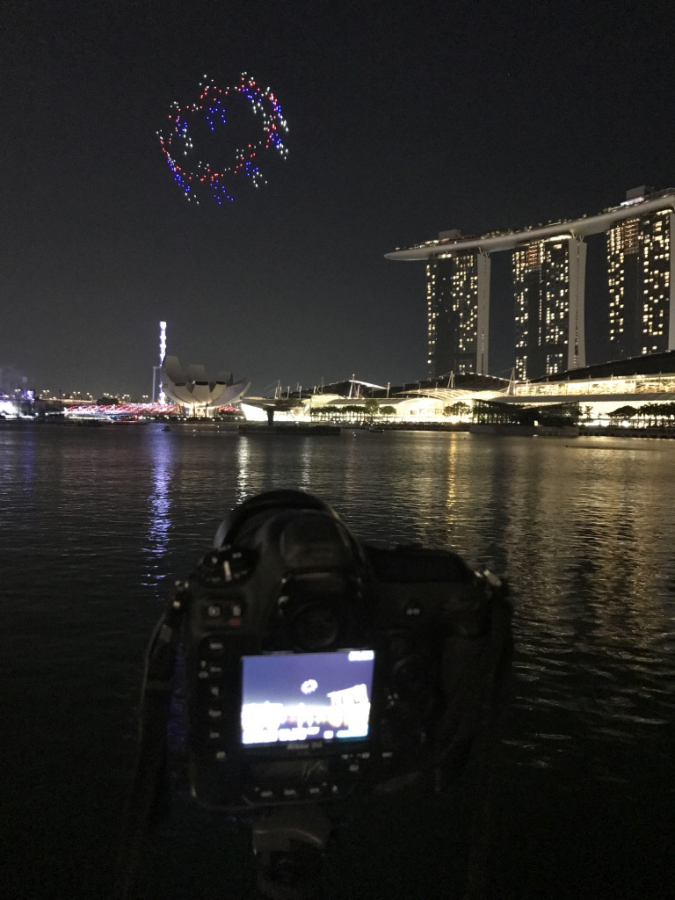
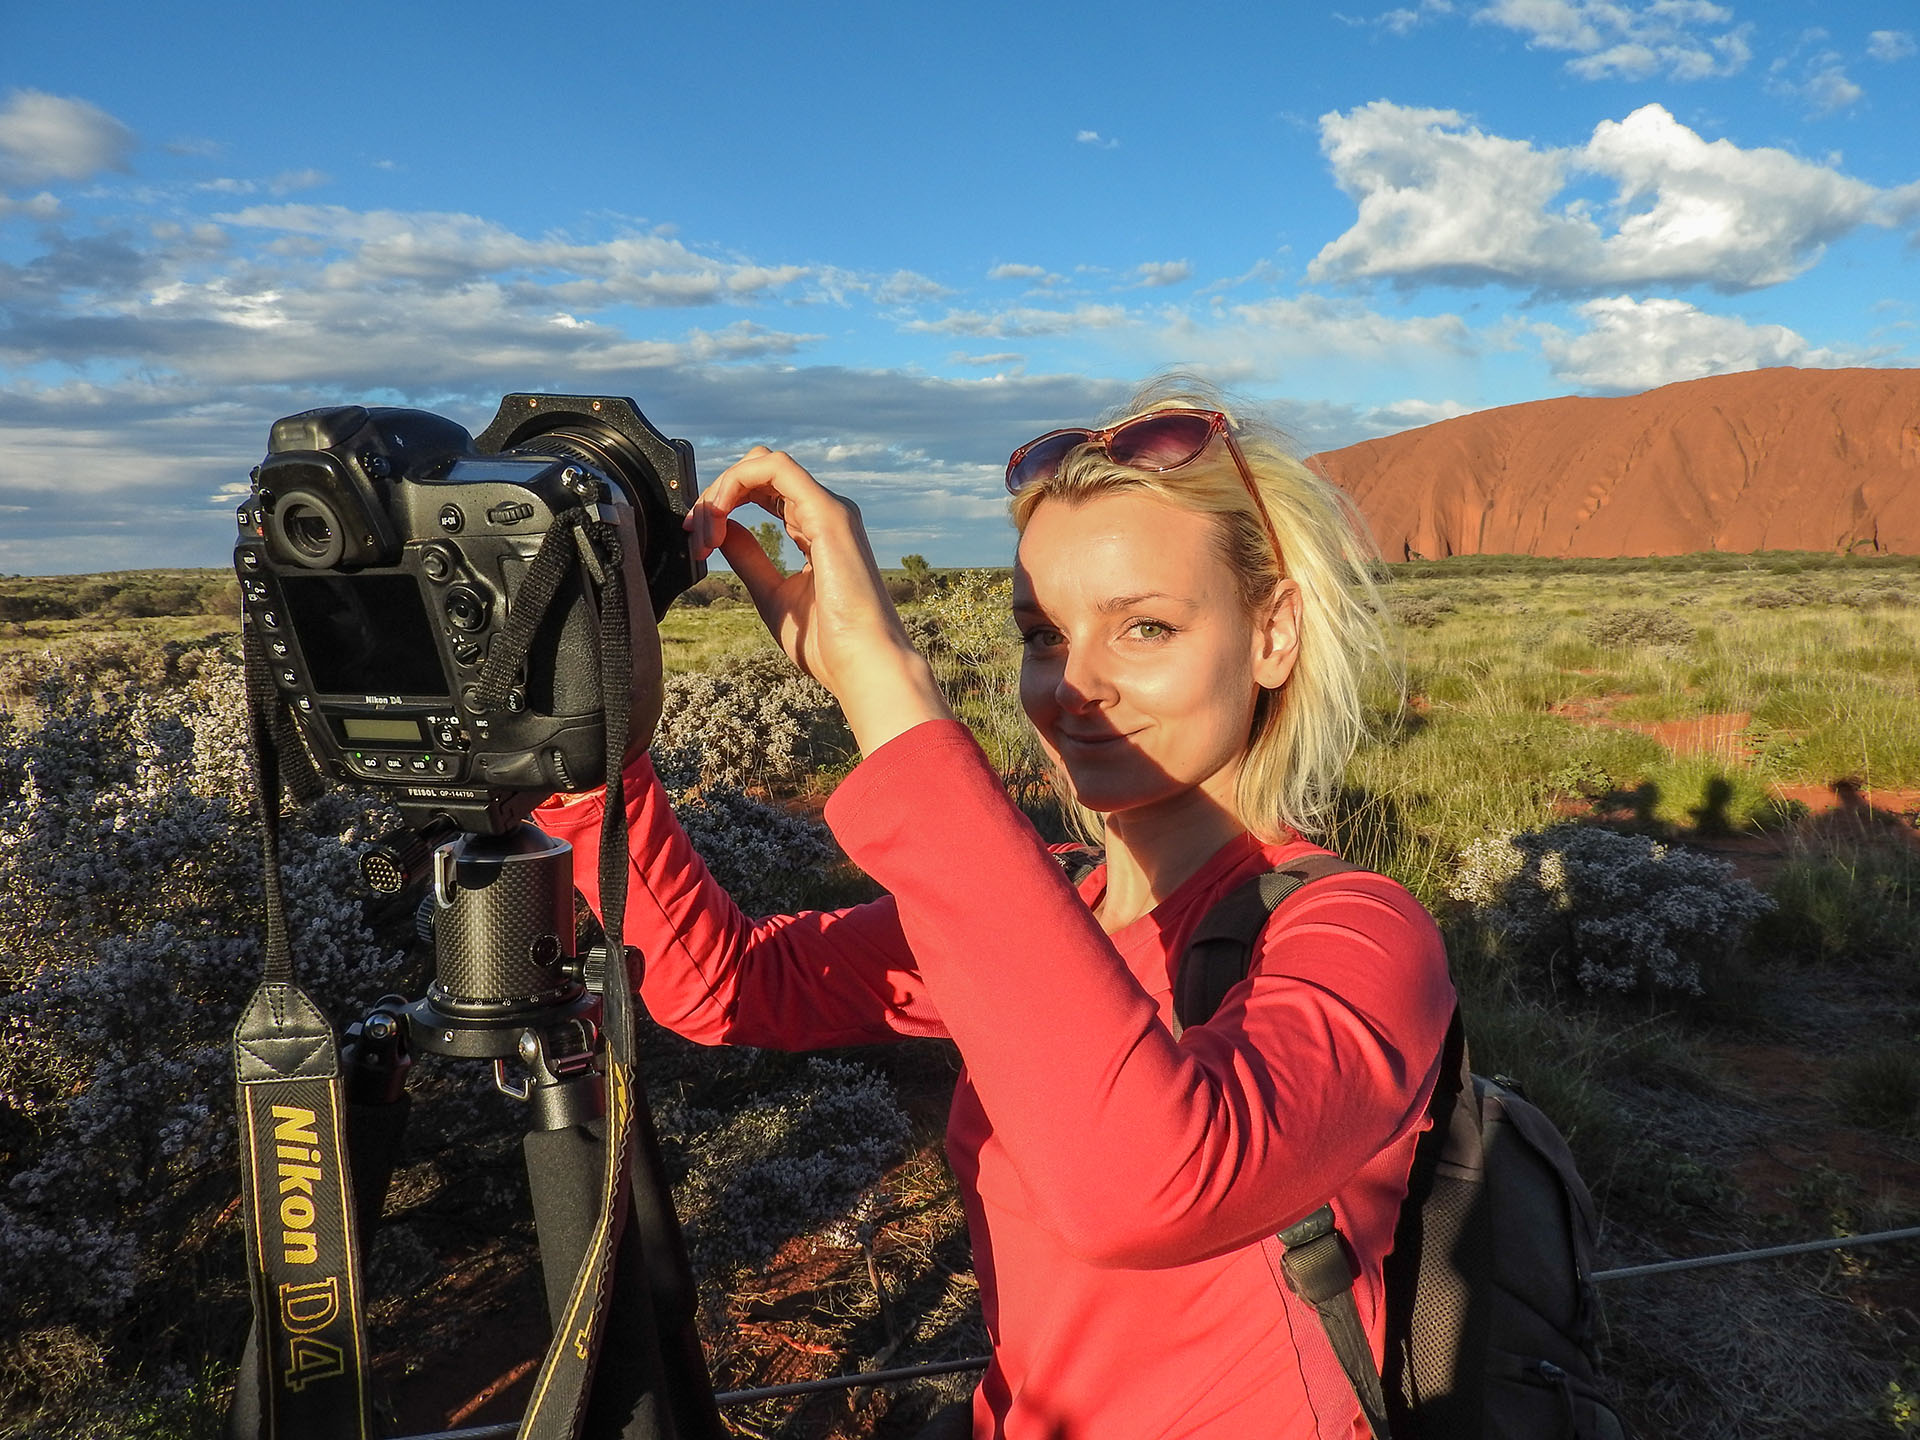
Nikon D4 camera on a tripod at night in front of Marina Bay Sand and fireworks
Reliable tripod needed!
  • Camera: We are talking here about DSLR camera or camera that allows you to shoot in manual mode (more details in tip #4)
  • Lens: Wide-angle lenses are usually a safe bet. Zoom lenses can be a good option if you want to be able to change frames. Keep in mind that once the show has started, it won’t be a great idea to change lenses so pick the most appropriate one (or bring several cameras!)
  • Tripod: Given the settings and slow speed we prefer to use for that type of photography, tripod is highly recommended
  • Remote control: A nice to have to help trigger the shutter without touching the camera

And like for any photo trip, especially at night-time, bring memory cards as well as a spare battery, most importantly if you are using the live view mode and if it’s cold.
And please…do not use a flash!

Tip 3: Keep enough room in your frame
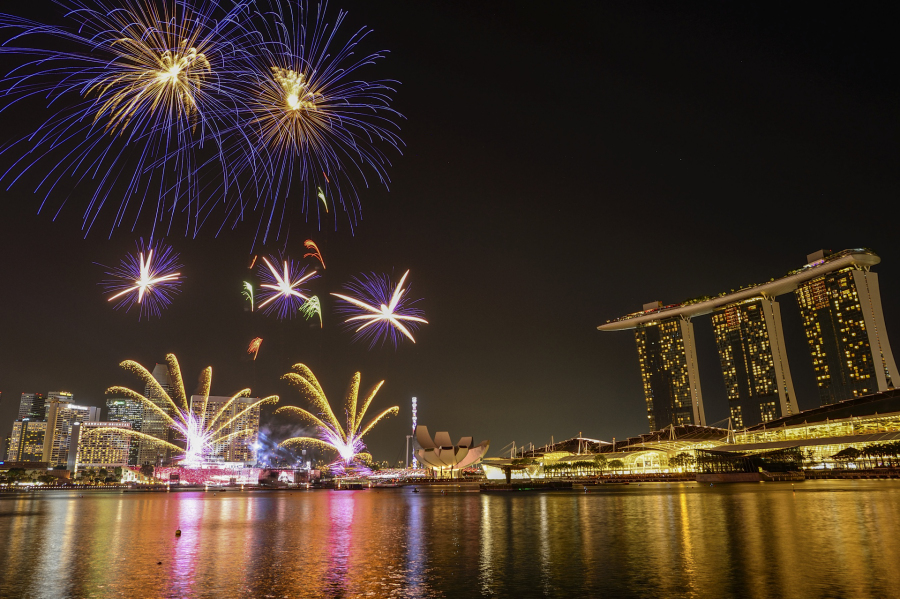
I would strongly suggest leaving enough room when you frame your picture before the show starts. It is impossible to know in advance how high the fireworks will go. It can get tricky not to have it cut, especially if you are relatively close from the platform. If you are uncertain, to be on the safe side, use a wide-angle lens (see tip #2).
Several firework bursts next to Marina Bay Sand
It can get tough to predict how high they will get…

 You can still crop it if you feel like when editing your picture. If you realise the firework is much higher than anticipated, don’t hesitate to stop the ongoing photo and reframe it right away (it would be cut anyway, so no need to waste more time on it).

Tip 4: Set manual mode, low ISO, medium aperture and slow speed
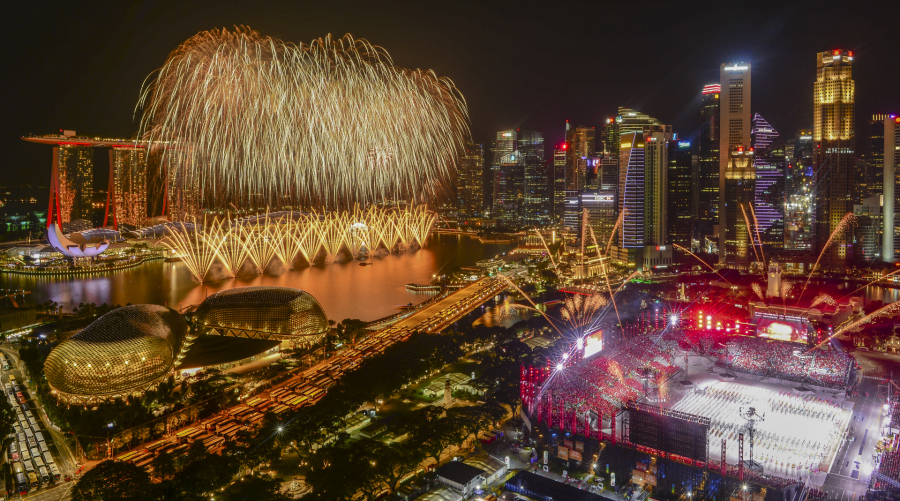
Fireworks from Stamford hotel balcony
Tripod, 100 ISO, f/16 and 13s
You will need to set your camera into Manual Mode to control yourself the aperture and speed. I have tried multiple sets of settings and this is what usually works well for me when using a tripod:
  • ISO: 100 or 200: Set it low as you won’t need high shutter speed and you use a tripod. Low ISO will also help prevent noise that arises from higher ISO and long exposure.
  • Aperture: Mid-aperture is perfect, from f8 to f11. Depending on your lens you can try to go higher (f16, f22) and gets everything sharp. Remember that if you open too much, aka with a small f, you may get over exposed.
  • Shutter Speed: In the range of 8s to 20s. Long exposure allows fireworks to track longer and to capture several bursts. With short exposure, fireworks can look small and not impressive. I tend to use 13s and 15s a lot and adjust based on conditions. If the image turns out overexposed or with too much smoke, shorten a bit the exposure time. If you are unsure, you can also use the Bulb mode and close manually once you think you captured enough of the scene.

Once the show starts, I would usually keep the same ISO and aperture and only play with the shutter speed.
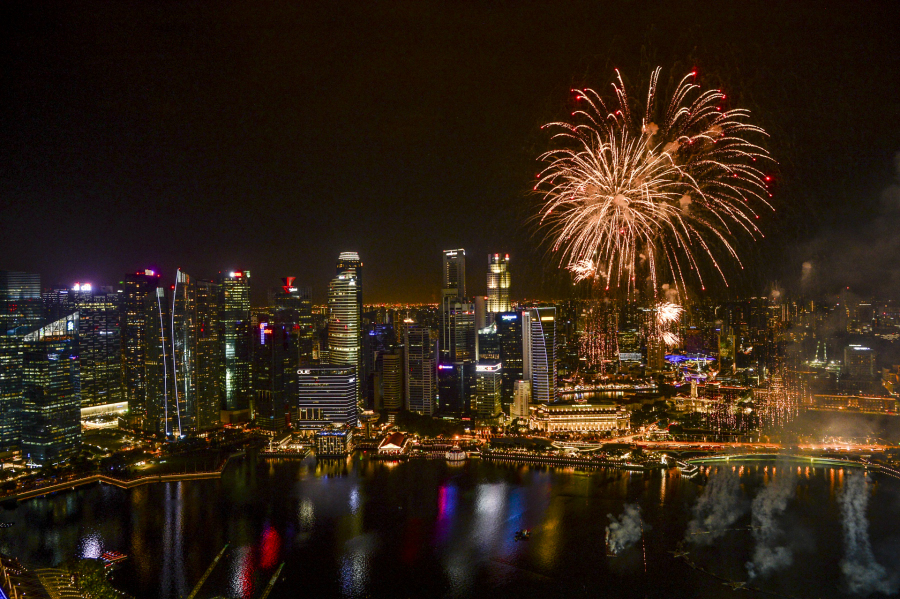
Fireworks from Stamford hotel balcony
Example of an handhled picture: 2000 ISO, f/4.5 and 1/25s
And what if you don’t have tripod or can’t get enough stability? Well, depending on your camera, you can try to do it handheld. Obviously you won’t be able to do very long exposure but can still capture some bursts. To do so, push your ISOs (1250-2000), open your aperture (=small f) and set a shutter speed that will avoid motion blur (1/50s, 1/80s).

Tip 5: Focus manually

With the autofocus on, your camera will try to refocus for each shot and given low light conditions it may struggle and focus on something else. So arrive early (as mentioned in tip #1), and set your focus before it gets dark. Focus on an object with the same distance as where the firework will be. If you struggle to get the focus right, set the focus to near infinity.
Then switch it to Manual focus (button on the side of your lens) to lock it in place.
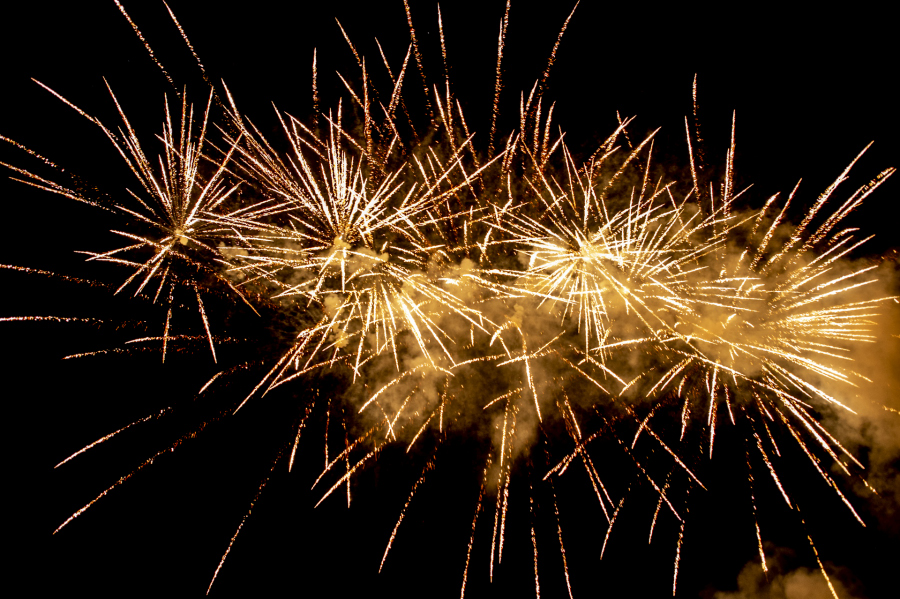
Close up of a golden firework

Tip 6: Shoot in RAW


If you plan to edit your images, switch the image quality to Raw.

Tip 7: Check your first shot on the spot and adjust if needed

Is it too bright? Is it blurry? What about the frame? Take the time to control and adjust if needed. We tend to have a sense of emergency when shooting fireworks, especially when they last only for a few minutes, but take the time. It will always be better to miss a couple of shots but get the others right than having the entire series messed up. You want to get the grand finale right!
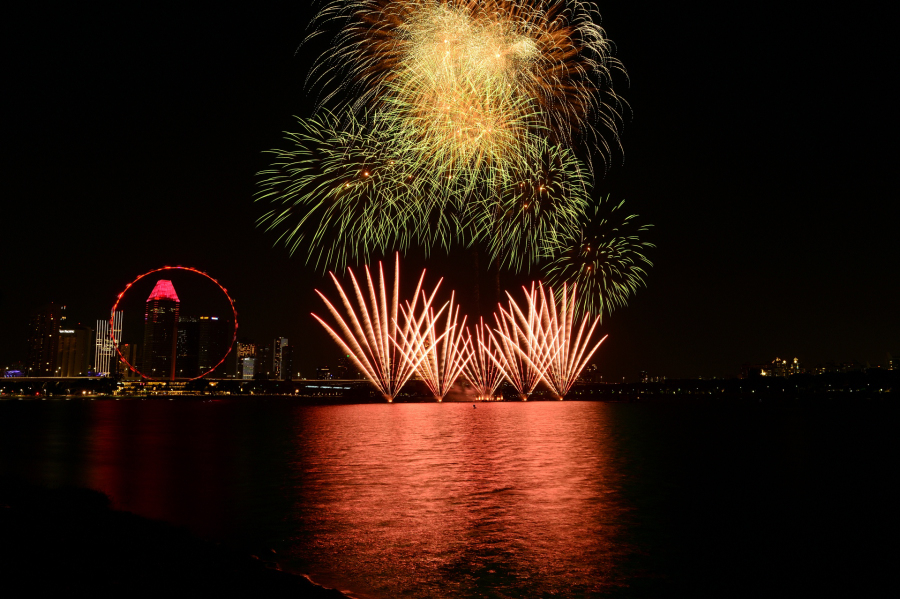
 

Green and red fireworks cut at the top
I knew it would be high but didn’t expect it to be that high…I actually stopped the camera as it was messed up anyway

Tip 8: Mind the smoke


Fireworks produce smoke and by the end of the show, if the breeze comes into your direction, the sky will be full of smoky clouds. While in certain circumstances it can get aesthetic, most of the time you don’t want to see it in your photo. Not to put pressure, but the earliest starbusts are usually the cleanest … so you may get your cleanest picture at the very beginning of the show, before too much smoke is around.
When it starts to get very smoky, I would try to balance by speeding a bit the shutter speed. If you still get too much of it and you think it messes up your pics, you can try to remove it in post-production.
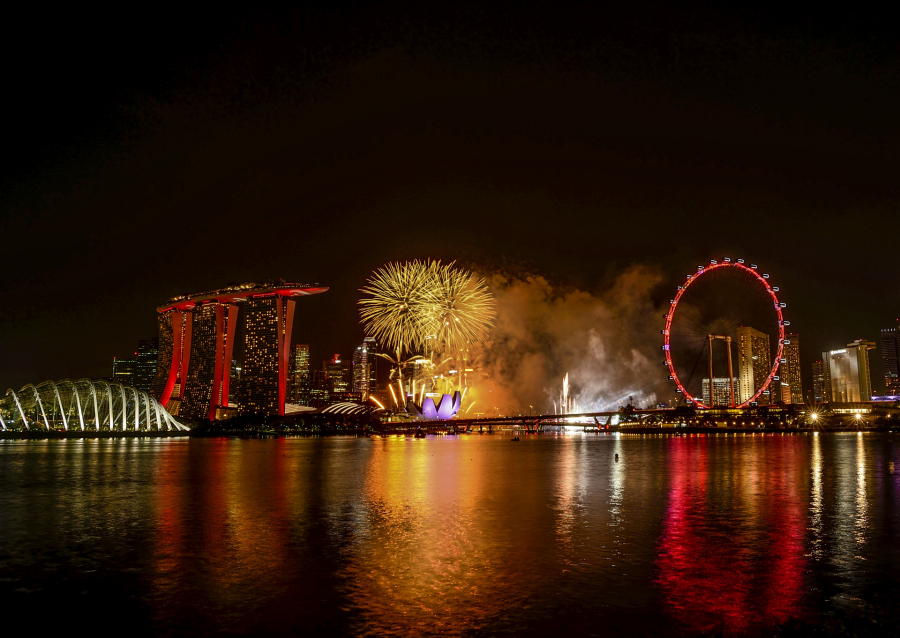
Fireworks in the middle with Singapore flyer on the right and MBS and the garden on the left
And smoke can even get much worse than that!
So these simple steps are usually what works for me. I hope they will help you too!
Please share the shots you get as well as any other tips you may use!
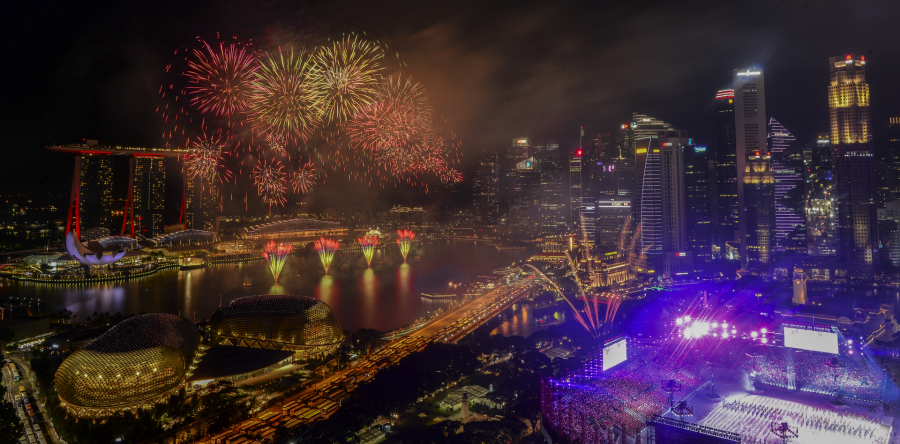
Singapore National Day Parade fireworks finale from Swiss hotel

How to create Sunstar effects in your photo?

How to create Sunstar effects in your photo?

You have probably seen pictures with a Sunstar effect, sometimes named Sunburst or Starburst – this is when the source of light takes the shape of a star.
You’ve always wondered how to get that effect on your picture? If this can be done directly with your DSLR camera and not in post-production? You’ve tried but failed or were not happy about the result?

Back to the techniques

To better understand and master sunstar effects, let’s first go through the technical explanation – all the tips below will make much more sense and will be easier to remember if we know the whys.

Why does it happen ?

All starts with diffraction. Diffraction is the modification of waves’ direction when passing through a narrow opening or close to an object. In photography, this happens when the light passes through the diaphragm of the lens. When the aperture is at its smallest (so when the f. is high), the blades are fully retracted, which constricts the light and creates diffraction. So the smaller aperture you have (so the higher f. you put), the more constricted the light will be, and the greater diffraction effect you get.

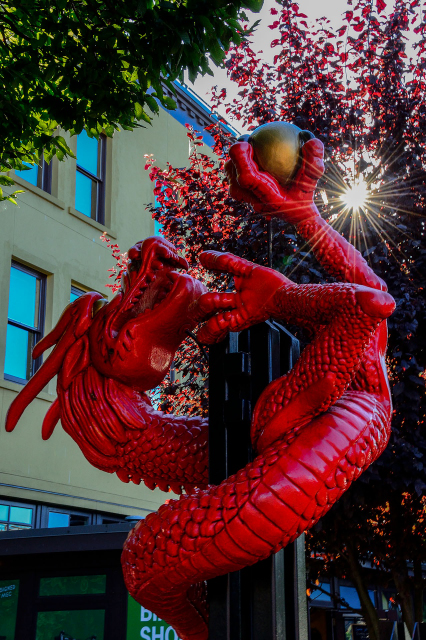
Statue of a red dragon with rays of sunshine forming a star towards the branches of a tree
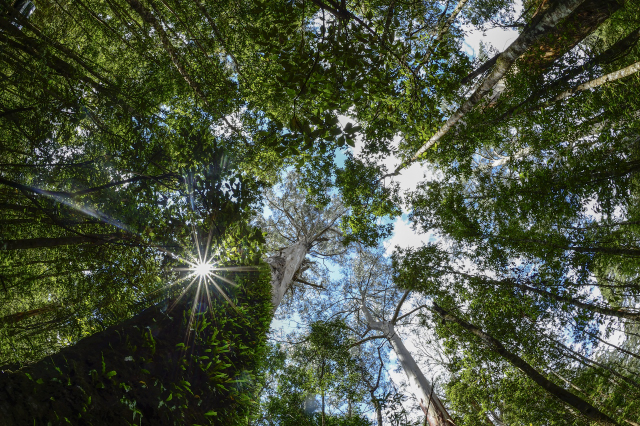
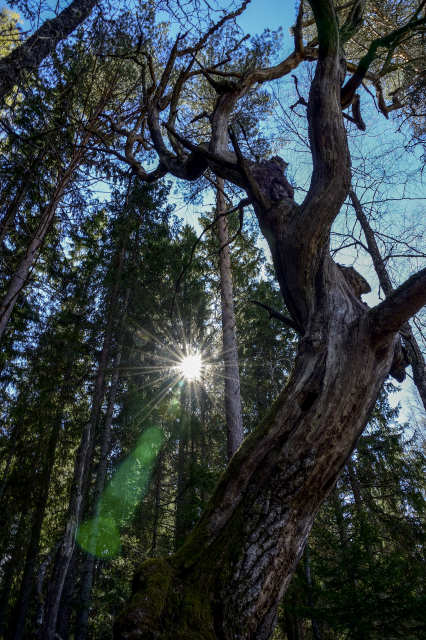
High trees from the ground with a sharp sunburst effect between branches
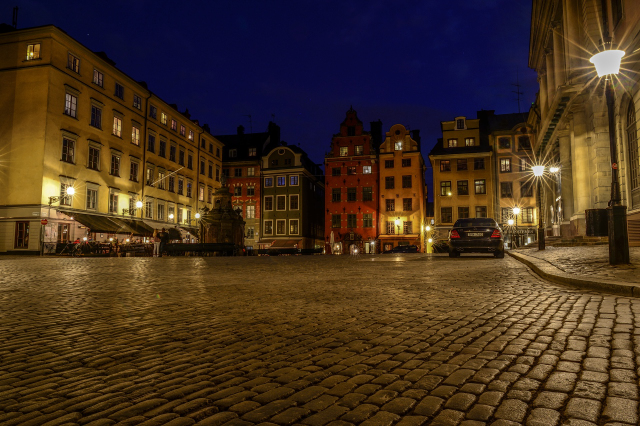
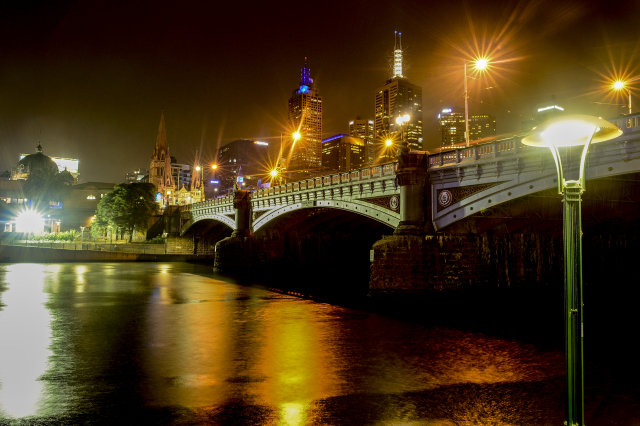
Pedestian street at night in Stockholm with lights forming a star effect

What determines the shape of the star?

● Size of the aperture opening : as seen above, the aperture has a direct impact on the sharpness of the star. With a wide opening (so a small f.), the opening won’t be obstructed enough to create diffraction. While a small opening will create a sharp star.
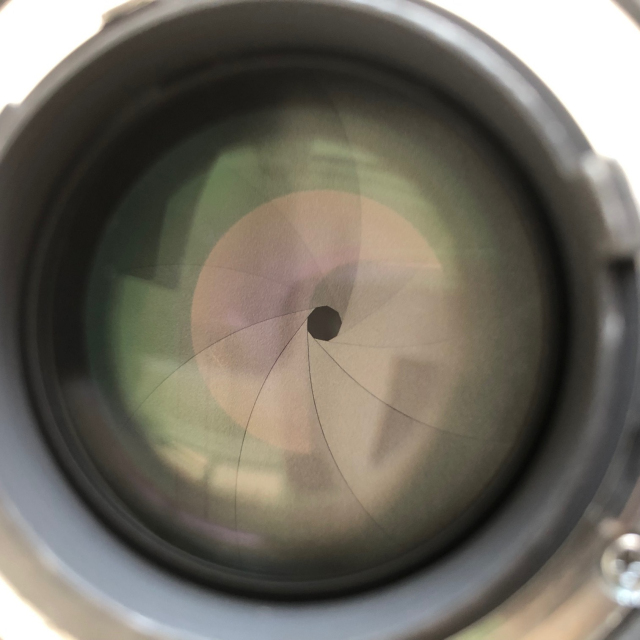
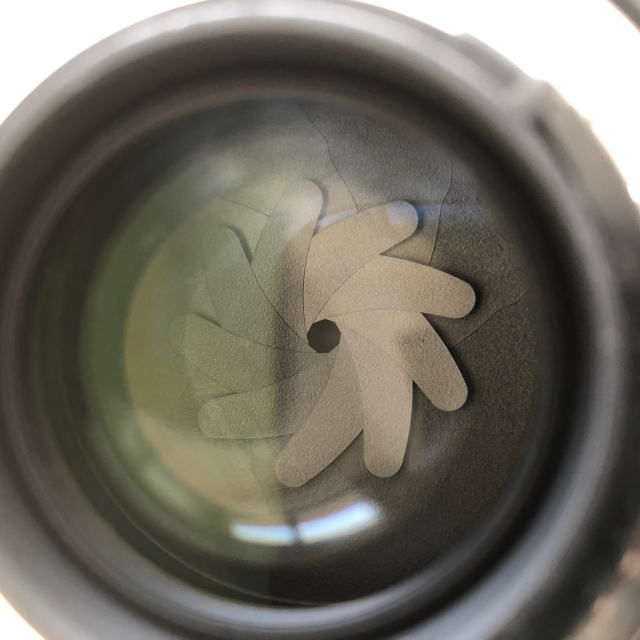
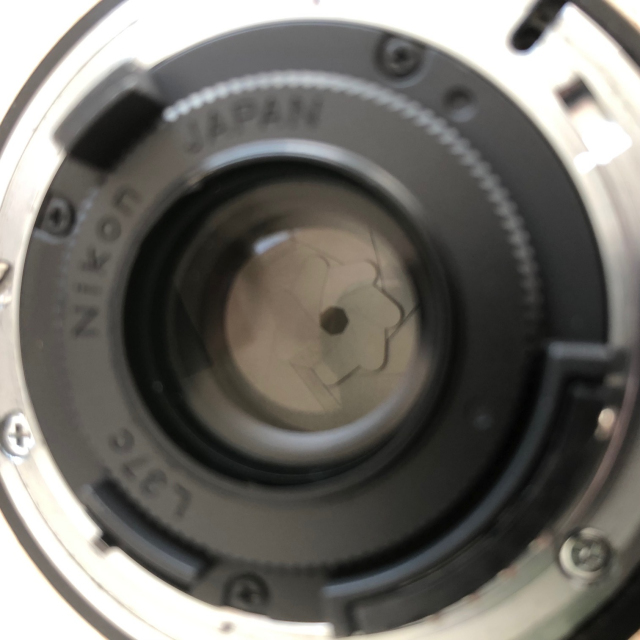
● The shape of the blades on the diaphragm: The aperture blades’ position and shape can vary a lot from one lens to another. In some lenses, the blades shape a circle without any hard corners. That will give a nice rounded bokeh effect but less a pointy star. While other lenses have their blades placed straight and they form a polygon. This will be perfect for a nice star effect.

Aperture blades of Nikon 24mm lens
Nikon 24mm: 9 blades so 18 rays while the opening is relatively circular
Aperture blades of Nikon 50mm lens
Nikon 50mm: 9 blades but a different shape
Aperture blades of Nikon Fisheye lens
Nikon Fisheye: 6 blades so 6 rays and a more polygonal opening

● The number of blades : the number of blades has a direct impact on the number of rays the star has. For lenses with an even number of blades, you will have the same number of rays than the number of blades : A 8-blade aperture will create a star with 8 rays. While in the case of a lens with an uneven number of blades, the number of rays will be the double : a 5-blade aperture will create a star with 10 rays. If you use Nikon, you can find here in column Bl quite an exhaustive list of Nikon lenses and their number of blades

Into practice

So with that in mind, what should you do to create a sunstar effect ?

Tip 1 : Pick the right lens
As we have seen above, the sharpness and the shape of the star are tightly tied to the lens. Try to pick a lens which can have a very small aperture – and ideally where the blades create a sharp polygon. And the more blades, the more rays.

Tip 2 : Use a small aperture
The smallest the aperture, the more visible the rays. So close the aperture to the minimum, from f16 to f22 depending on your lens.

Tip 3 : Set your camera in Manual Mode
You want to be able to define all the settings to get the exposure right. With such a small aperture and a bright sun, you can easily get an overexposed and almost white image. Favor underexposure to keep all the details. Depending on the conditions, and especially if it’s quite dark, you will need to play both with the speed and ISO. For instance, if you are in a forest and without a tripod, to avoid blurring from a small aperture, you may want to keep a relatively fast speed and so you will push up ISOs.

Tip 4 : Partially obscure the source of light
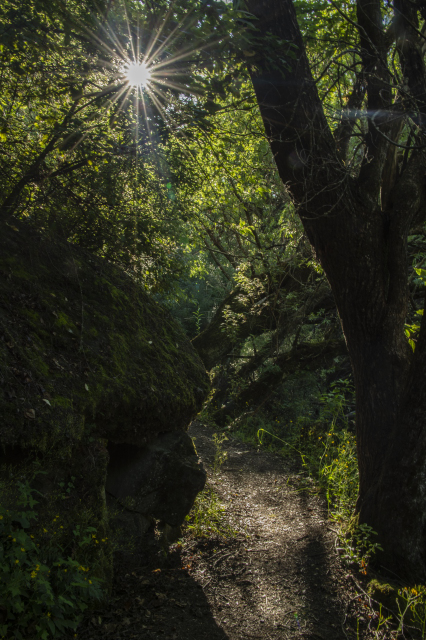
You will notice that depending on the position of the camera towards the source of light, the result may be quite different. You may not always get a star, even though your settings are correct. The star usually gets sharper and clearer when the light hits an object like a building or a tree. I think the easiest is with branches – I do a lot of those pics in forest. Once you found a nice place with rays of light going through, if you don’t get the star in the first shot, keep going, just move slightly until the star appears properly. Quite often, it’s only a matter of one or two centimeters more on the right or more on the left.

Path in the forest with sunstar effect between branches
Play hide and seek with the branches
Sunburst effect in the forest with large green flare effect in the foreground
A nice star but a nice green flare too!

Tip 5 : Beware of the ghosting flare
While shooting for starbust, you may experience another type of flare you actually don’t want : circular or semi-circular green-ish halos, otherwise named « ghosting flare ». Wide-angle lenses usually minimise the ghosting effect while it will increase with longer lenses. You can try to put your hand over the lens and block off the light, or slightly change your position. However, depending on circumstances, it can be tricky to get rid of it, while keeping a perfect star effect ! Worse case scenario, try to minimize it as much as possible and clean the halos with a software. If you want to know more about flares, this article is quite straight-forward.


Tip 6 : Clean your lens!
By facing the light to directly, all the dust you may have on your lens will appear fairly clearly on the picture. This will be most specifically true if there is a light color in the background. If you don’t want to spend too much time on editing, make sure to clean up your lens!

Check my portfolios and travel galleries to see more sunstars !

Bridge in Melbourne at night with lights reflection in water

On the hunt trail of a beautiful leopard

On the hunt trail of a beautiful leopard

I have been twice in Maasai Mara Reserve in Kenya, staying both times at Melting Pot Safari, a camp with guides trained for photographers. The daily safari routine is quite straight forward: you wake up before sunrise, grab a quick snack, get in the car and drive up to the ridgeline to capture the sunrise. Then you spend the morning driving around, observing wildlife and you come back to the camp at lunch time. Which is also when the sun is the hardest and most animals are sleeping. You have another game-drive later in the afternoon until sunset.
Usually, you get the chance to have one full-day game drive during your stay: you leave the camp early morning and come back only at the end of the day. It is quite tiring for the driver but it enables you to go a bit further.

Sunrise from the ridgeline, always a good motivation to wake up early
On August 14, we got our so long waited full-day game drive with Mark, our guide-driver. We had been in Kenya for 4 days already.It was just the middle of our trip. We had been lucky so far: Cheetahs, lions, elephants, hyenas, hippo, giraffes… we got to see the beauty of Mara. But no great sighting of leopards. The day before, we found one sleeping, hidden,… and surrounded by 20 cars. In my previous trip to Kenya I got super lucky on leopards, and had several encounters with the beautiful Olive. I was secretly hoping to live that type of moments again. But with nature, you never know!
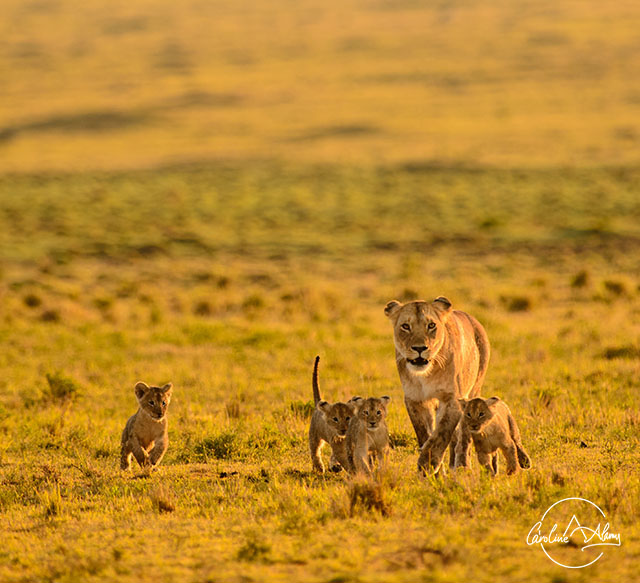
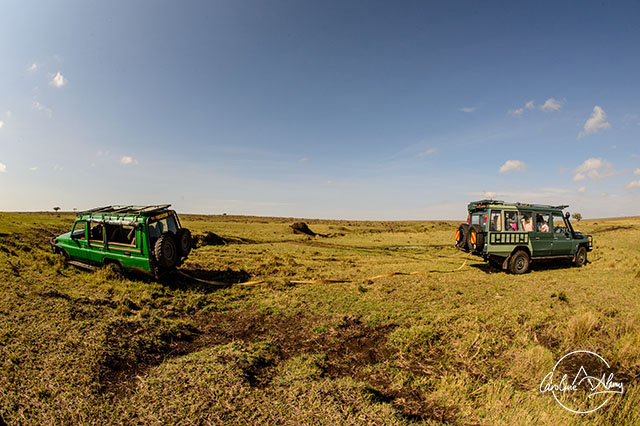
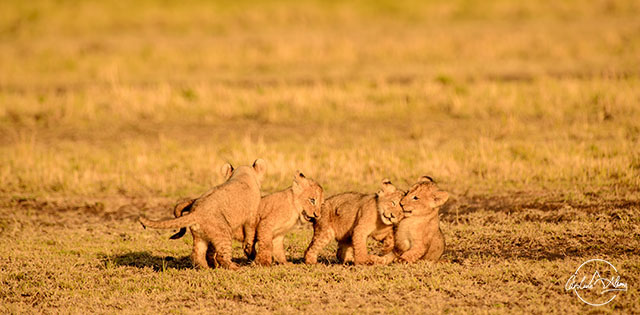
So we left that day, just happy to be here, thrilled by the smell of early mornings, ready to purely enjoy what nature would bring: a cute group of playful lion cubs with their mother, vultures, ostriches. And we even got swamped on the way. Got pulled out by another jeep. And off we go!
A happy family met on the way
Good thing for us, another jeep was in the area and managed to help us out
They kept arguing together when they were not messing up with their mother!
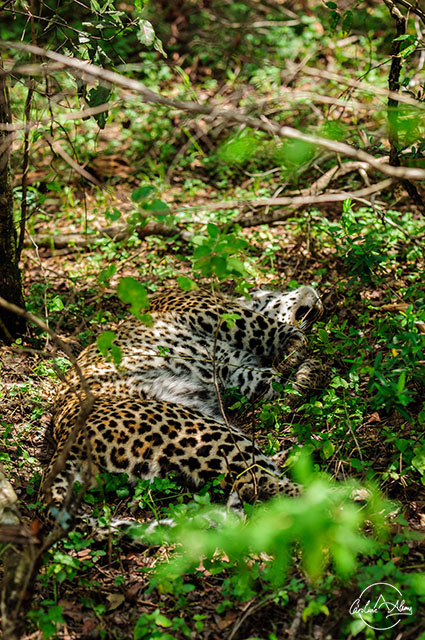
At 11am we reached a bushy area. Jeeps were packed and lining around a tree. They were standing for 5 minutes and then would leave the way to the next one queuing. The reason for such a traffic jam: Bahati, a female leopard, was sleeping on the ground. Mark guessed, by the size of her belly, that she was here to hunt. The area was full of wilderbeests. But he also knew that, because of the disturbing crowd, she would not do anything and would lay on the ground instead. So we took our “tourist shot”, left her alone, and got our lunch near the river, maybe 5 minutes away from Bahati spot.
We came back 45 minutes later. All the cars were gone. We were completely alone. We went back to the tree and… of course Bahati had already left. “She is gone for hunting, she must be quite close, let’s find her.”, Mark said.
We were driving around and around, super slowly, super cautious. The wildebeests were there. Plenty of them. But no sign of Bahati.
The “tourist shot” after queuing for a bit
I was searching, scrutinizing all the branchs, herbs, ground. Without much hope, to be honest, as I had been pretty weak so far at spotting animals. Massai guides are beyond impressive. They can smell cheetahs walking 200 meters away completely out of sight. They can spot, with the naked eye, a hyena 300 meters away, and describe its face covered by blood. I would struggle to see the animal with binocular, so its face?…And, regularly, I would proudly show a big stone which I thought was a lion…
So, me, finding a leopard in the middle of the bush? No way. I am counting on Mark. And the more we drive around, the more desperate we are.
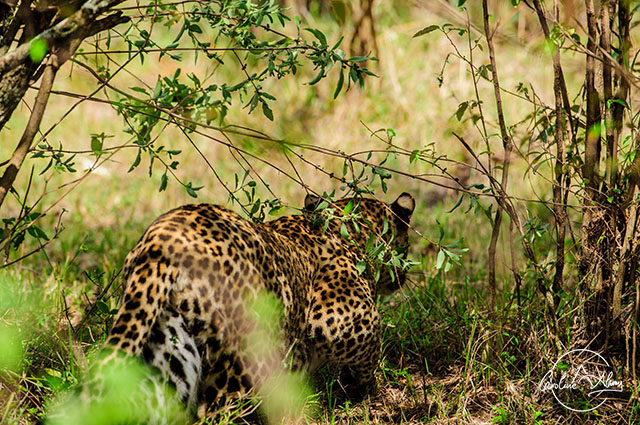
So you can imagine my surprise when a dotted yellow bottom and tail came in my field of view. My heart litterally jumped. Bahati was less than 1 meter away from our car. “She is here!!!, she is here!!!”, I yelled (which is obviously the last thing you should do, but good news is, my voice doesn’t carry far).
Mark braked immediately. “She is about to hunt, get ready, she is about to hunt”, he urged us.
Bahati is getting ready to jump on the baby wildebeest
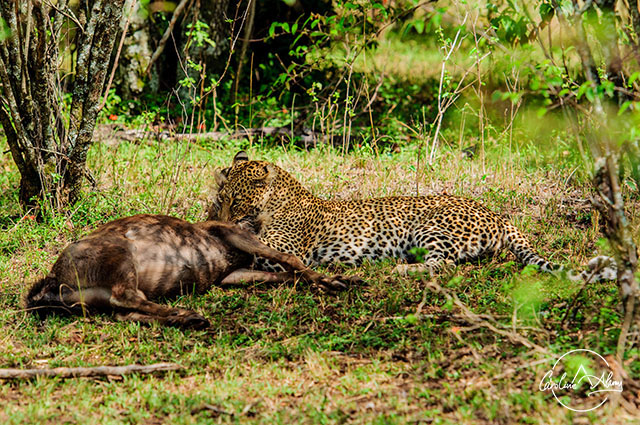
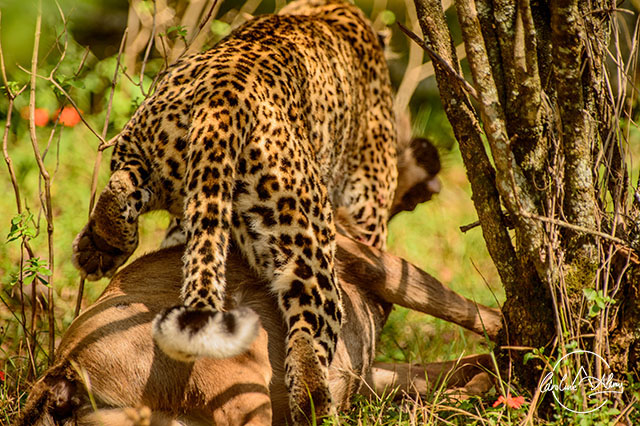
Bahati was holding the baby wildebeest very firmly on the ground…
And, indeed, Bahati started to slowly and carefully flatten on the ground. We could distinguish a baby wildebeest and his mother in the background. Bahati flattened her body completely. Her ears were pointed out. She started to move her bottom and…she jumped. In one jump she grabbed the baby wildebeest at the throat. There were a few short frightened screams. The wildebeest mother ran away in the bush. The baby wildebeest collapsed on the ground. Bahati was holding him firmly at the throat. He was still and suffocating.
Everything became weirdly quiet. Seconds after seconds you could see the breath of the wildebeest slowing down, until stopping. Completely.
There was, I think, less than a minute between the moment we spotted Bahati and the attack. Everything went so fast. It was so bushy that I had trouble with the focus of my camera and I messed up my pictures of the jump. We were so close that my 300mm lens was more an issue than anything else. My hands were shaking out of stress. It was the first time I witnessed a hunt, and a kill. I remember Mark thought I was thrilled as I had tears in my eyes. I was actually really sad for the wildebeest. The screams…
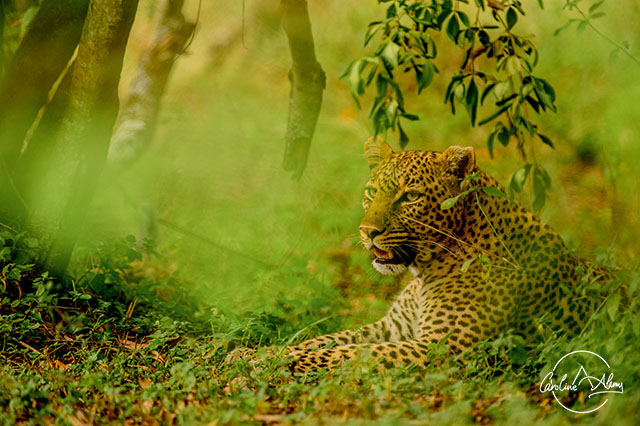
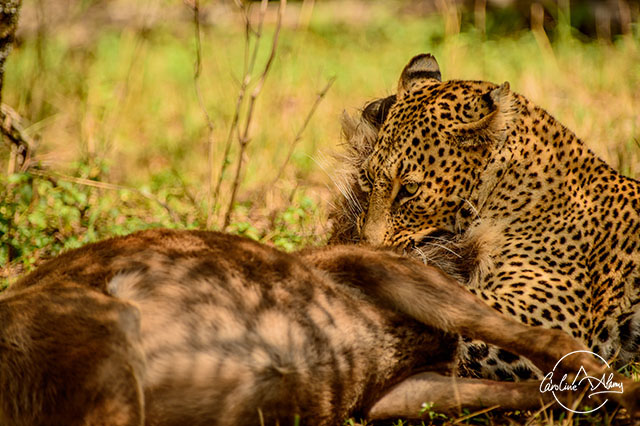
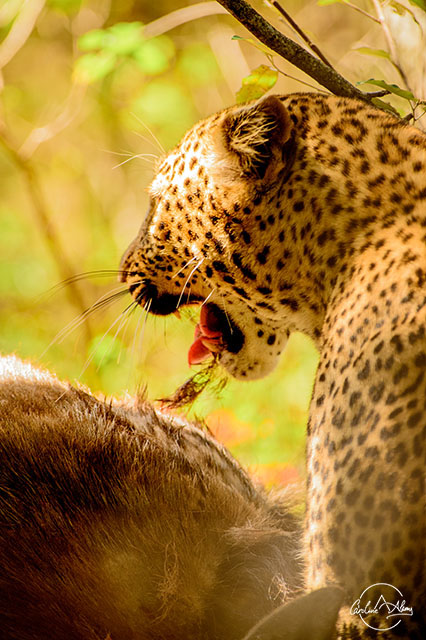
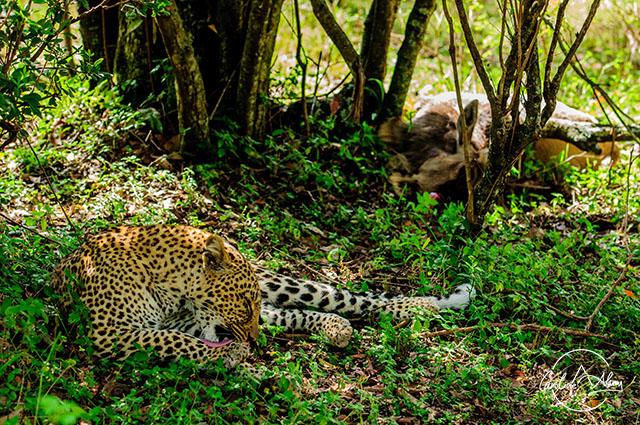
We spent the next 2 hours completely alone with Bahati. She was still a young leopard, and the wildebeest, even though baby, was big for her. Bahati was exhausted. She stayed for quite a while on the ground, panting next to her kill, without even touching it. She ripped off a bit of the fur. But then went back to rest. She was surrounded by a vivid green crown of leaves, under a soft lighting. Perfect for pictures.
…until his last breath
It was fast but intense… after the kill, Bahati kept panting
Bahati started to rip off the fur… before resting again
After a good 45 minutes, Bahati started to drag the wildebeest’s body on the ground. We thought she would climb on a tree with it – this is common for leopards to do that to protect their food from others.
However, after a few meters, she just stopped and laid again on the ground. She was still panting.
She struggled to drag the killed baby wildebeest…
…and had to rest for a while
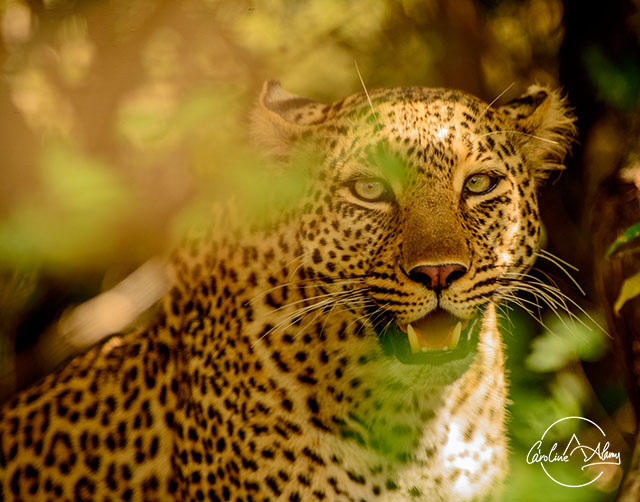
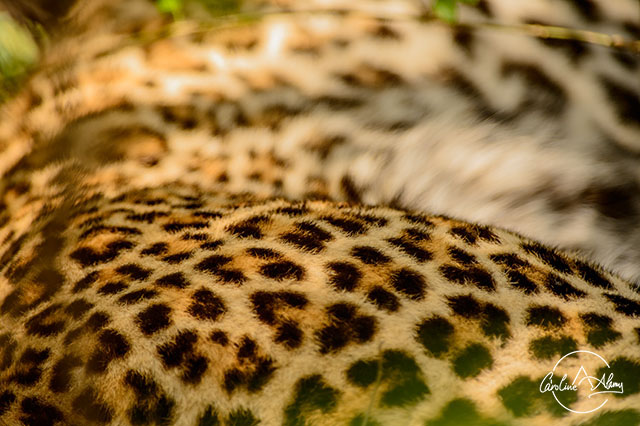
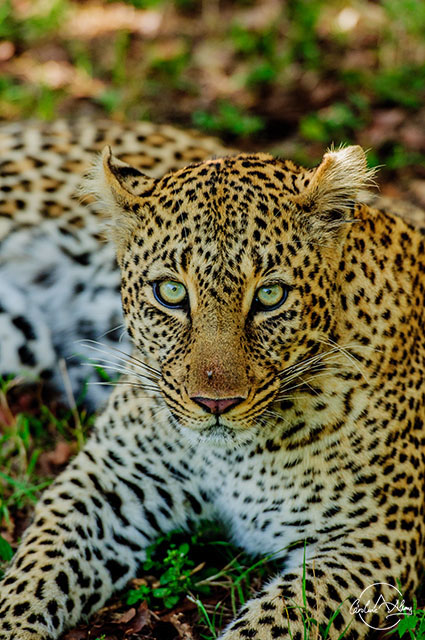
Every now and then, she would make a few steps, surprisingly towards our car, without the wildebeest, and then lay again. Eventually she was really close to our jeep. She looked at us several time. We were completely quiet. She was so close that I could only use my 70-200mm and I was not able to have her entire body into the frame. I love close-ups, shooting details (eyes, fur etc.), so I enjoyed ! And being so close to a beautiful big cat like that…
Time for some close-ups!
Such beautiful eyes

A jeep arrived. It was past 2 pm. People would start to come back. We decided to leave, happy to have lived such an intimate moment.
We learnt the next day that Bahati didn’t eat much of her kill, she let it on the ground and hyenas stole it.

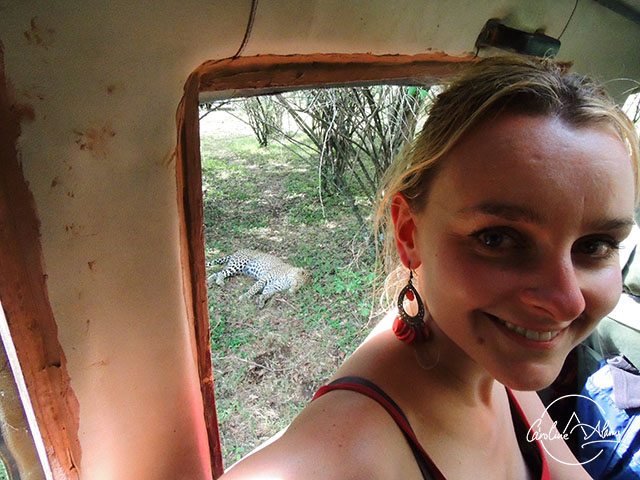
Me and Bahati 🙂

My favorite photo of this encounter with Bahati

If you want to see more pics of leopards and from safaris in Kenya, this is here.

Quick Photo Tips

It is challenging in wildlife photography, especially from a jeep, to go away from documentary shots and be artistic. When you are lucky to stay next to an animal for a few hours, it is a great opportunity to try new things once you got 1-2 shots that you like:

  • Composition: The subject is surrounded by an environment which may be interesting to include in the picture. Always try to look at the entire frame you are shooting. Does everything make sense? Is something cut while it should not ? If your equipment allows it, try to have different point of view: include the landscape, then make some close ups (eyes, paws, fur, ears), portraits, etc.
  • Mode: if you tend to use the Aperture, or Speed mode, try to go Manual. You have time to make experiments. See what you get when you change the speed-aperture-iso combination and the white balance. Does it look better slightly under-exposed? or over-exposed? How does it turn out if you have a warmer white balance? or a colder one?
  • Observe and anticipate: Taking pics in a safari is great but what is even better is understanding your subject, the animal, its behavior. I tend to get pissed when I hear someone shooting a sleeping animal with burst mode. Observe your subject, understand what he is doing, anticipate what he will do next. Take out your eyes from the camera and just observe. You will feel when something is about to happen, you will guess by the body posture, and you will shoot at the right time…which leads to…
  • Be selective: A friend of mine has a very interesting approach: he only shots pictures he would like to print and have on his wall. When you behave like that, you will be much more careful at when you shoot, how you shoot, the parameters, the framing etc. Instead of having 30 ok and similar shots; you may have one stunning picture. And you save so much time when sorting everything !
  • Tripods in a jeep may be challenging, if not impossible…Bring a “bean bag” (it looks like that) with you and place it on the window, on the roof of the jeep, to help you get stability, especially if you have a heavy lens. You can easily make one at home by filling a bag with dry beans, rice, buckwheat etc.
  • My parameters : Most of the pics you see on this page of Bahati in the bush are done with ISO above 1000, the widest aperture (f2.8 and f5.6) I could get and fast speed (from 1/500 to 1/1000).

Quick Travel Tips

  • Your safari guide/driver is key. A good one will not only go where he heard there is a good sighting happening but, above all, he will look for the animals himself. He knows them, their habits and their behaviors; he knows how to read the footprints on the ground, his senses are super developped. He deeply enjoys searching for the animals, and he can teach you what he knows. I got amazing safari experiences. The guides I was lucky to have played a huge part. In Kenya, I highly recommend Melting Pot Safari. 
  • Noise, screams, can frighten animals. As much as surprised, or happy (or scared!) you are, try to refrain. Be quiet, calm, super patient. You will maximise your chance to have an interesting sighting, on top of respecting the animal.
  • Depending on where you do your safari, you may experience crowd, jeeps surrounding animals and disturbing them. This is not ideal for you and even less for the animals. As much as it is tempting, don’t ask your guide to go in the way of the animal just for you to have a nice pic. Animal should be first. Let them the space they need.