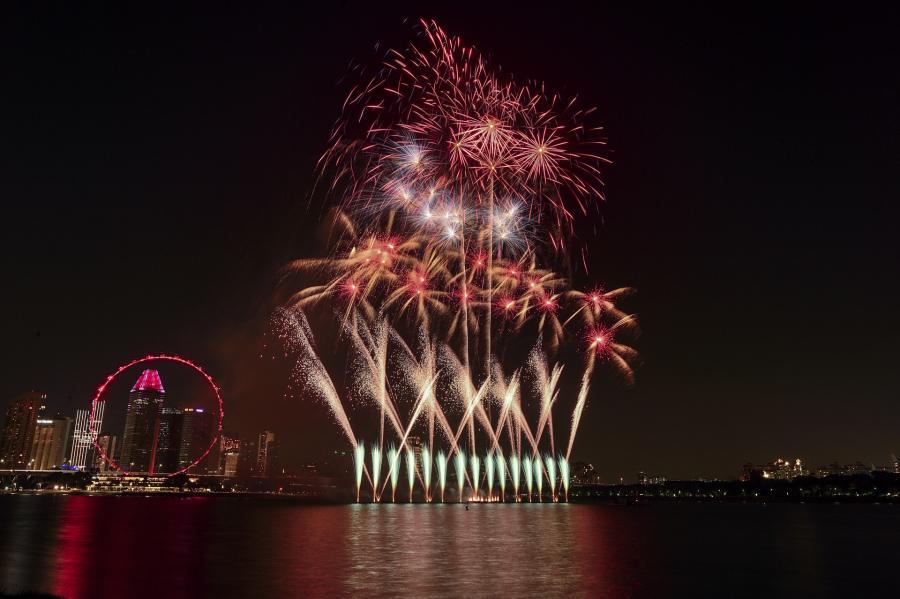
How to photograph fireworks with 8 easy tips
New year celebrations are around the corner and you are not sure how to capture the fireworks with your camera? Fireworks photography is a difficult one, and even trickier as you may not have multiple opportunities to practice. What can go wrong? Pictures are too bright, too smoky, firework is out of focus or out of frame. But this can be easily avoided by following some easy steps.
Tip 1: Scout out the location

Tip 2: Bring the right equipment

- Camera: We are talking here about DSLR camera or camera that allows you to shoot in manual mode (more details in tip #4)
- Lens: Wide-angle lenses are usually a safe bet. Zoom lenses can be a good option if you want to be able to change frames. Keep in mind that once the show has started, it won’t be a great idea to change lenses so pick the most appropriate one (or bring several cameras!)
- Tripod: Given the settings and slow speed we prefer to use for that type of photography, tripod is highly recommended
- Remote control: A nice to have to help trigger the shutter without touching the camera
And like for any photo trip, especially at night-time, bring memory cards as well as a spare battery, most importantly if you are using the live view mode and if it’s cold.
And please…do not use a flash!
Tip 3: Keep enough room in your frame

You can still crop it if you feel like when editing your picture. If you realise the firework is much higher than anticipated, don’t hesitate to stop the ongoing photo and reframe it right away (it would be cut anyway, so no need to waste more time on it).
Tip 4: Set manual mode, low ISO, medium aperture and slow speed

- ISO: 100 or 200: Set it low as you won’t need high shutter speed and you use a tripod. Low ISO will also help prevent noise that arises from higher ISO and long exposure.
- Aperture: Mid-aperture is perfect, from f8 to f11. Depending on your lens you can try to go higher (f16, f22) and gets everything sharp. Remember that if you open too much, aka with a small f, you may get over exposed.
- Shutter Speed: In the range of 8s to 20s. Long exposure allows fireworks to track longer and to capture several bursts. With short exposure, fireworks can look small and not impressive. I tend to use 13s and 15s a lot and adjust based on conditions. If the image turns out overexposed or with too much smoke, shorten a bit the exposure time. If you are unsure, you can also use the Bulb mode and close manually once you think you captured enough of the scene.
Once the show starts, I would usually keep the same ISO and aperture and only play with the shutter speed.

Tip 5: Focus manually
Then switch it to Manual focus (button on the side of your lens) to lock it in place.

Tip 6: Shoot in RAW
If you plan to edit your images, switch the image quality to Raw.
Tip 7: Check your first shot on the spot and adjust if needed
Is it too bright? Is it blurry? What about the frame? Take the time to control and adjust if needed. We tend to have a sense of emergency when shooting fireworks, especially when they last only for a few minutes, but take the time. It will always be better to miss a couple of shots but get the others right than having the entire series messed up. You want to get the grand finale right!

Tip 8: Mind the smoke
Fireworks produce smoke and by the end of the show, if the breeze comes into your direction, the sky will be full of smoky clouds. While in certain circumstances it can get aesthetic, most of the time you don’t want to see it in your photo. Not to put pressure, but the earliest starbusts are usually the cleanest … so you may get your cleanest picture at the very beginning of the show, before too much smoke is around.
When it starts to get very smoky, I would try to balance by speeding a bit the shutter speed. If you still get too much of it and you think it messes up your pics, you can try to remove it in post-production.

Please share the shots you get as well as any other tips you may use!